 |
| Little Stars Toddler Group, Ashtead, Surrey |
Showing posts with label Craft toddler Ashtead 'little stars toddler group' toddler group. Show all posts
Showing posts with label Craft toddler Ashtead 'little stars toddler group' toddler group. Show all posts
Tuesday, 9 July 2013
Little Stars Toddler Group, Ashtead, Surrey
For those of you that might be interested in joining our toddler group, this is what it looks like. It is run by mums for mums. We have loads of nice toys, soft toys for little ones, arts & crafts (obviously), singing and dancing, juice and biscuits, tea and coffee. Lovely!

Wednesday, 3 July 2013
June - Mixed UP Monsters
These Mixed UP Monsters are such a simple piece of craft for toddlers but the result looks striking.

Here is a list of things that you will need to make your Mixed UP Monsters:
/ Brightly coloured paints, watered down
/ Art straws
/ A4 paper
/ Boggollie eyes
/ Black felt tip pen
/ Glitter
Follow these simple steps to make your Mixed UP Monster with your crafty toddler
1/ Pour two blobs of paint next to each other on the paper
Top Tip: The paint blobs should be about the size of a 10p piece
2/ Use the straw to blow the paint around the paper, creating all sorts of odd shapes and colour mixes
Top Tip: If your toddler wants to suck the paint up the straw then ditch the straw and instead get them to lift the paper up so the paint runs and mixes
3/ Sprinkle glitter if desired whilst the paint is wet
4/ Leave to dry
5/ Stick on boggolie eyes
Top Tip: Using the felt tip pen draw on unique features such as horns, wings, bow tie, brief case, teeth etc.
How much fun was that!!!!
Here are some of the Mixed UP Monsters that we created at toddler group:

Here is a list of things that you will need to make your Mixed UP Monsters:
/ Brightly coloured paints, watered down
/ Art straws
/ A4 paper
/ Boggollie eyes
/ Black felt tip pen
/ Glitter
 |
| Prep kit for Mixed UP Monsters |
1/ Pour two blobs of paint next to each other on the paper
Top Tip: The paint blobs should be about the size of a 10p piece
2/ Use the straw to blow the paint around the paper, creating all sorts of odd shapes and colour mixes
Top Tip: If your toddler wants to suck the paint up the straw then ditch the straw and instead get them to lift the paper up so the paint runs and mixes
3/ Sprinkle glitter if desired whilst the paint is wet
4/ Leave to dry
5/ Stick on boggolie eyes
Top Tip: Using the felt tip pen draw on unique features such as horns, wings, bow tie, brief case, teeth etc.
How much fun was that!!!!
Here are some of the Mixed UP Monsters that we created at toddler group:
 |
| Purple Monster |
 |
| Splodge monster |
 |
| Dribble monster |
 |
| Folded monster |
 |
| Furry monster |
 |
| Butterfly monster |
 |
| Our monster family |
Friday, 31 May 2013
May - Ice Cream Tower
Thought that these ice cream towers might help make the summer feel more real - these are fun to do and can be enjoyed by older children too. Prep takes a little bit of time (15 mins) but the actual decoration time can be as long as your little ones are interested.. there are loads of way to decorate the scoops.
Things you will need to make your crafty ice cream tower:
Coloured card (cut in to rough circles or oval shapes)
PVA glue
Felt tip pens
Coloured paints
Glitter (optional)
Sequins (optional)
Art tissue paper (or other light materials to decorate with)
Paper plate
Coffee stirrer
Follow these steps to make your craft ice cream tower:
1/ Fold the paper plate in half and draw the outline of a traditional ice cream bowl on it using the felt tip
2/ Take any number of the coloured card circles / ovals and decorate with paint / pens / glitter / tissue paper / sequins
Top tip - why not make some look like waffles or draw on some swirls or cut some of the card away to make it look as if it were melting or draw on some fruit.
3 / Once dry, stick the ice cream scoops to the paper plate to create an ice cream tower
4 / Stick the coffee stirrer diagonal across the back of the ice cream scoops to add stability but also look like the neck of a spoon when viewed from the front and voila you tasty looking ice cream tower is ready to admire.
Top tip - if your ice cream tower begins to lean forward, add another coffee stirrer along the back length.


 |
| Ice cream tower |
Coloured card (cut in to rough circles or oval shapes)
PVA glue
Felt tip pens
Coloured paints
Glitter (optional)
Sequins (optional)
Art tissue paper (or other light materials to decorate with)
Paper plate
Coffee stirrer
 |
| Craft preparation for ice cream towers |
1/ Fold the paper plate in half and draw the outline of a traditional ice cream bowl on it using the felt tip
2/ Take any number of the coloured card circles / ovals and decorate with paint / pens / glitter / tissue paper / sequins
Top tip - why not make some look like waffles or draw on some swirls or cut some of the card away to make it look as if it were melting or draw on some fruit.
3 / Once dry, stick the ice cream scoops to the paper plate to create an ice cream tower
4 / Stick the coffee stirrer diagonal across the back of the ice cream scoops to add stability but also look like the neck of a spoon when viewed from the front and voila you tasty looking ice cream tower is ready to admire.
Top tip - if your ice cream tower begins to lean forward, add another coffee stirrer along the back length.

Monday, 11 March 2013
March (week 9) - Finger Monsters
Finger monsters are a really fun thing to make with your crafty toddler. Prep time only takes 3-5 mins and the craft fun can keep going until you have more finger monsters than you can handle!
Things you will need to create your crafty finger monsters are:
/ Cardboard (from breakfast cereal boxes is good for this too)
/ Scissors
/ Paints & brushes or sponges
/ PVA glue
/ Sequins
/ Glitter
/ Dark felt tip pen
/ Bogglie eyes
To make your crafty finger monsters follow these steps:
/ Draw the outline of your monster on the cardboard and cut out (any shape is fine, think about adding some hair or a hat or horns to the outline).
/ Mark and cut out the areas for your or your toddlers fingers.
/ Get decorating with paints, sequins, pompoms or glitter - whatever takes your fancy!
/ Leave to dry.
/ Stick on your bogglie eyes.
/ Draw on a mouth (smiles or mouths with goofy teeth work well).
Here are some of the finger monsters that our craft toddlers made!
 |
| The finished product - finger monster |
/ Cardboard (from breakfast cereal boxes is good for this too)
/ Scissors
/ Paints & brushes or sponges
/ PVA glue
/ Sequins
/ Glitter
/ Dark felt tip pen
/ Bogglie eyes
 |
| Finger monster prep kit |
/ Draw the outline of your monster on the cardboard and cut out (any shape is fine, think about adding some hair or a hat or horns to the outline).
/ Mark and cut out the areas for your or your toddlers fingers.
/ Get decorating with paints, sequins, pompoms or glitter - whatever takes your fancy!
/ Leave to dry.
/ Stick on your bogglie eyes.
/ Draw on a mouth (smiles or mouths with goofy teeth work well).
Here are some of the finger monsters that our craft toddlers made!
 |
| Our finger monster family |
 |
| Finger monster close up |
Thursday, 7 March 2013
March (week 8) - Mother's Day Cards
Making a Mother's Day card is a lovely gesture and with it only taking a few minutes for both the prep and creation - its a win win!
Here is what you will need to create your Mother's Day card:
/ Blank greetings cards (or a sheet of card that you can fold in half)
/ Felp tip pen
/ Glue
/ Glitter (girlie colours)
/ Sequins
/ Stick on hearts
/ Paints & brushes
/ Craft pompoms
Follow these simple steps to make your toddler art and craft Mother's Day card:
/ Draw a large heart on the front of the card with the felt tip pen.
/ I think that a nice touch is to write the name of the person that you are giving the card to below the heart (such as mummy, nannie, granny, grandma).
/ Decorate the heart and the card to your toddlers content
- use sequins to outline the heart then use glitter or paint to fill in the middle of the heart
- use the stick on hearts to create a pattern
- paint the heart and then decorate with pompoms
- another nice idea is to put a hand print on the inside or on the back of the card.
Top tip: write your message in the card before decorating it, that way you will have a finished card that will just need to dry and no awkward writing with pompoms getting in the way!
 |
| The finished Mother's Day Cards |
/ Blank greetings cards (or a sheet of card that you can fold in half)
/ Felp tip pen
/ Glue
/ Glitter (girlie colours)
/ Sequins
/ Stick on hearts
/ Paints & brushes
/ Craft pompoms
 | |
| Mother's Day Card prep |
Follow these simple steps to make your toddler art and craft Mother's Day card:
/ Draw a large heart on the front of the card with the felt tip pen.
/ I think that a nice touch is to write the name of the person that you are giving the card to below the heart (such as mummy, nannie, granny, grandma).
/ Decorate the heart and the card to your toddlers content
- use sequins to outline the heart then use glitter or paint to fill in the middle of the heart
- use the stick on hearts to create a pattern
- paint the heart and then decorate with pompoms
- another nice idea is to put a hand print on the inside or on the back of the card.
Top tip: write your message in the card before decorating it, that way you will have a finished card that will just need to dry and no awkward writing with pompoms getting in the way!
 |
| More examples of the Mother's Day cards created |
February (week 7) - Decorating Insects & Reptiles
Painting and decorating inspects and reptiles is very easy and quick art and craft piece to do with toddlers. The prep time is only about 5 minutes and the fun can last as the insects and reptiles can be embellished until your toddlers are all art and crafted out!
Things you will need to create your insects and reptiles are:
/ A4 paper (any colour)
/ Paints (any colour)
/ Range of different paint brushes
/ Glitter (any colour)
/ Art straws
/ Black felt tip pen
/ PVA glue
/ Sequins
/ Wooden coffee stirrers
/ Cellotape
Follow these steps to make your beautiful insects and reptiles:
/ First thing is to cut out the insects reptiles - this is a job for an adult obviously. To cut out multiple copies just draw the outline on one piece of paper then stack up approx 10 pieces behind the template when you cut it out.
/ For the butterfly, stack up some paper, fold in half, draw the outline then cut it out.
/ Get decorating - it's up to your crafty toddler how to decorate but you can paint first and adorn with sequins and glitter later or you can glue first and layer on the decorations painting once the glue is dry.
/ Leave to dry.
/ Draw on eyes and smiles to make your animals friendly.
/ Cellotape a coffee stirrer to the back of the animal to make it come alive!!!
Top tip: keep the animals / objects that you cut out as large as possible this makes it easier for crafty toddlers to hold and decorate at the same time.
You can put your own spin on this, cut out some different animals or objects such as fish, lions, flowers, leaves and heart.
 |
| The finished product - decorated lizard |
/ A4 paper (any colour)
/ Paints (any colour)
/ Range of different paint brushes
/ Glitter (any colour)
/ Art straws
/ Black felt tip pen
/ PVA glue
/ Sequins
/ Wooden coffee stirrers
/ Cellotape
 |
| Decorated insects and reptile prep |
/ First thing is to cut out the insects reptiles - this is a job for an adult obviously. To cut out multiple copies just draw the outline on one piece of paper then stack up approx 10 pieces behind the template when you cut it out.
/ For the butterfly, stack up some paper, fold in half, draw the outline then cut it out.
/ Get decorating - it's up to your crafty toddler how to decorate but you can paint first and adorn with sequins and glitter later or you can glue first and layer on the decorations painting once the glue is dry.
/ Leave to dry.
/ Draw on eyes and smiles to make your animals friendly.
/ Cellotape a coffee stirrer to the back of the animal to make it come alive!!!
Top tip: keep the animals / objects that you cut out as large as possible this makes it easier for crafty toddlers to hold and decorate at the same time.
You can put your own spin on this, cut out some different animals or objects such as fish, lions, flowers, leaves and heart.
 |
| Decorated snake |
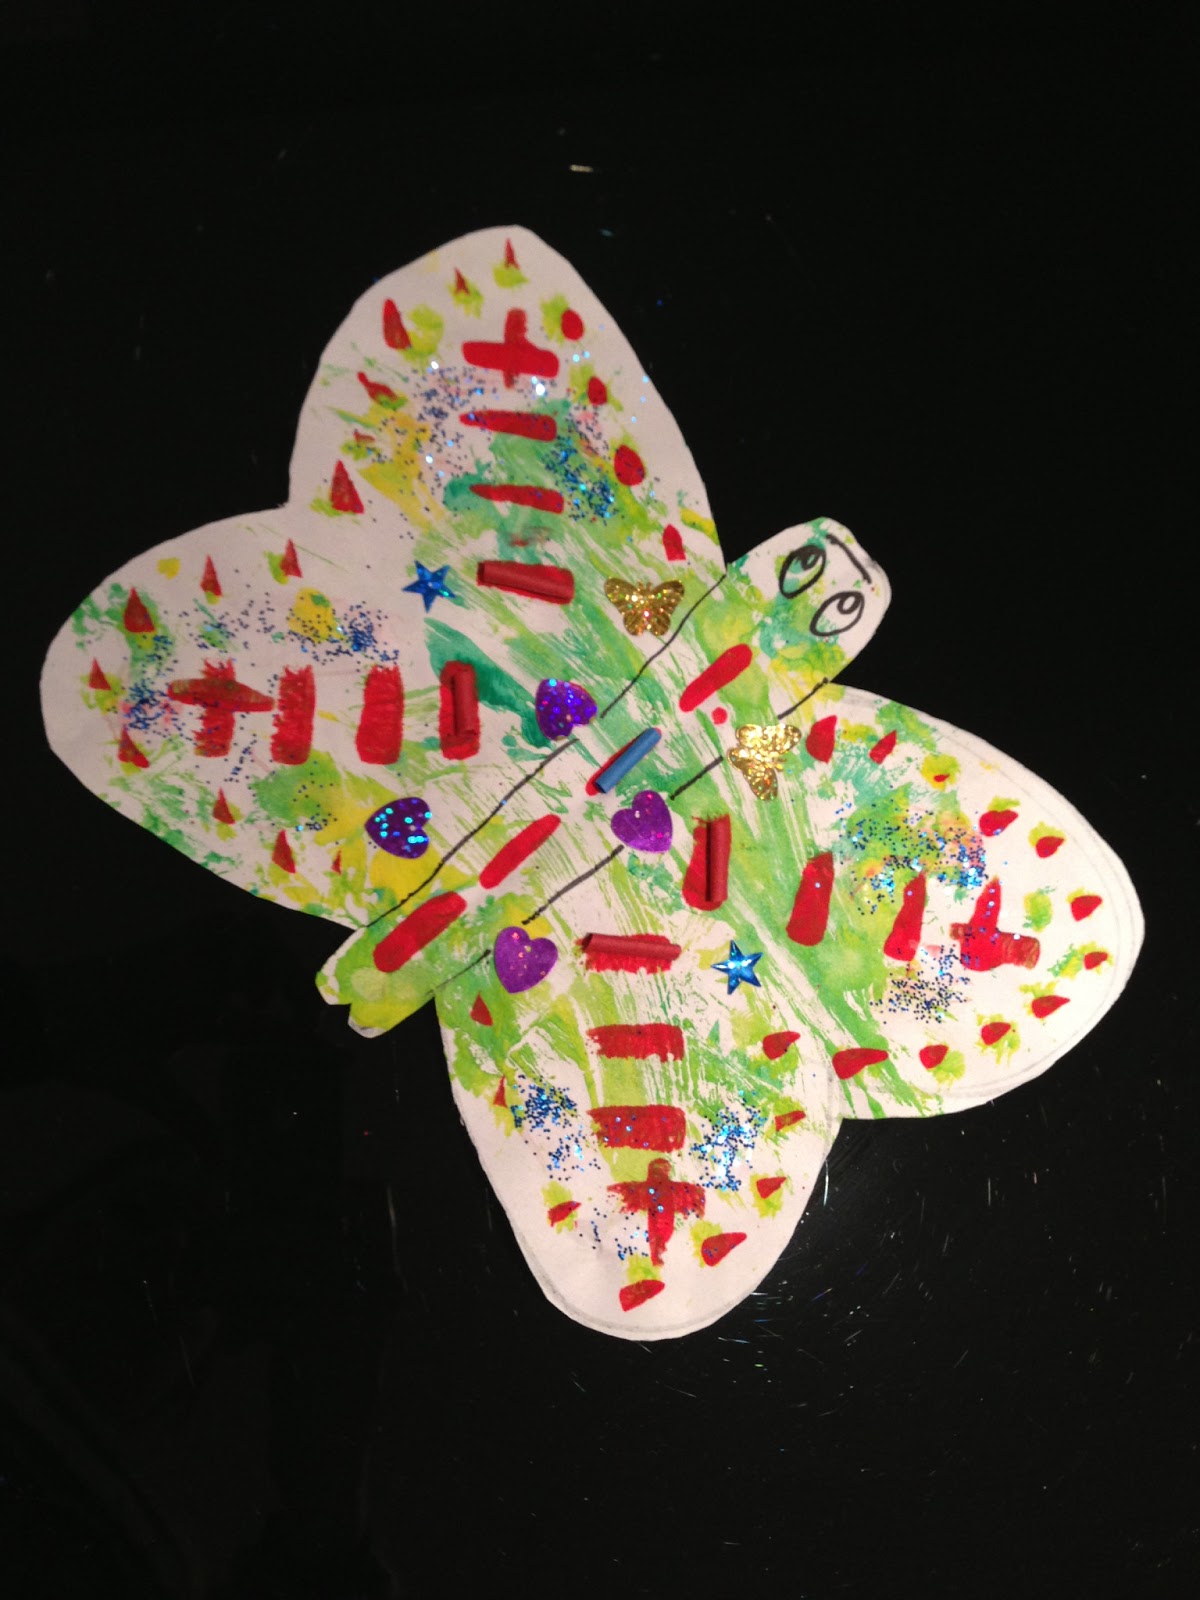 |
| Decorated butterfly |
Monday, 11 February 2013
February (week 6) - 'I love ewe' valentines card
Seems as it is lambing season and valentines day, I though that making a sheepy a valentines card that the toddlers could give to a loved one could be an interesting craft combination. Preparation takes about 10 mins.
To make your 'I love ewe' valentines card you will need:
/ Toilet roll inners
/ PVA glue
/ Thick card for legs, neck and head
/ Stapler
/ Felp tip pens (black or navy)
/ Cotton wool
/ White tissue paper
/ Glitter
/ Heart shaped stickers
Steps to make your 'I love ewe' valentines cards are as follows:
1/ Crinkle up the white tissue, then flatten out and roll around the toilet roll inner, staple in place.
2/ Draw and cut out your sheep face, attach to a 'L' shaped piece of card board and then staple to inside of sheep body.
3/ Cut out 2x 1cm think strips of card for the legs. Attach to the under side of the sheep body by stapling in the middle of the strip of card. Fold the legs either side of the staple so the sheep can stand on its own feet.
4/ Write your valentines message on the body of the tissue using the felt tip pen.
5/ Apply some glue to different areas of the body, including the sheep fringe and stick on some cotton wool.
6/ Sprinkle on some glitter and stick on some heart stickers.
There you have it a cute 'I love ewe' valentines day card to give to someone special.
 |
| I LOVE EWE valentines card |
/ Toilet roll inners
/ PVA glue
/ Thick card for legs, neck and head
/ Stapler
/ Felp tip pens (black or navy)
/ Cotton wool
/ White tissue paper
/ Glitter
/ Heart shaped stickers
 |
| I LOVE EWE prep |
1/ Crinkle up the white tissue, then flatten out and roll around the toilet roll inner, staple in place.
2/ Draw and cut out your sheep face, attach to a 'L' shaped piece of card board and then staple to inside of sheep body.
3/ Cut out 2x 1cm think strips of card for the legs. Attach to the under side of the sheep body by stapling in the middle of the strip of card. Fold the legs either side of the staple so the sheep can stand on its own feet.
4/ Write your valentines message on the body of the tissue using the felt tip pen.
5/ Apply some glue to different areas of the body, including the sheep fringe and stick on some cotton wool.
6/ Sprinkle on some glitter and stick on some heart stickers.
There you have it a cute 'I love ewe' valentines day card to give to someone special.
 |
| I LOVE EWE's created by our crafty toddlers |
 | |
|
Saturday, 9 February 2013
February (week 5) - Newspaper Fish
Newspaper fish is a great craft piece for both adults and toddlers alike. Preparation takes about 10 mins and the crafty fun can carry on for as long as the crafty toddlers are interested.
Thing you will need to make your newspaper fish craft are:
/ Newspaper
/ A4 white paper
/ A4 blue paper
/ PVA glue
/ Sequins
/ Black felt tip pens
The steps to make your crafty toddlers newspaper fish are as follows:
/ Draw some fish, shark, octopuses, nessy monsters on a newspaper and cut out (tip: try to cut through as many sheets as you can to save you cutting out the same shape over and over).
/ Take a piece of blue A4 paper and rip a wavy line across the long side of the paper, about 10cm from the top. Discard the smaller ripped off piece.
/ Crumple up the large piece of blue paper and then flatten out and stick on top of the white A4 using glue.
/ Now the fun begins... select your sea animals and stick on in any place or direction that you like.
/ Use a felt tip pen to draw faces, bow ties, hair, teeth, gills on to the sea animals.
/ Stick opn some sequins for eyes of the sea animals
/ Apply some glue to certain areas of the craft (e.g. the top of the sea, around the sea animals) and then use some glitter to jazz the sea scene up
/ Use a felt tip pen to draw some seaguls and boats above the ocean.
And voila! A lovely sea animals scene!!
 |
| The finished product - News paper fish |
/ Newspaper
/ A4 white paper
/ A4 blue paper
/ PVA glue
/ Sequins
/ Black felt tip pens
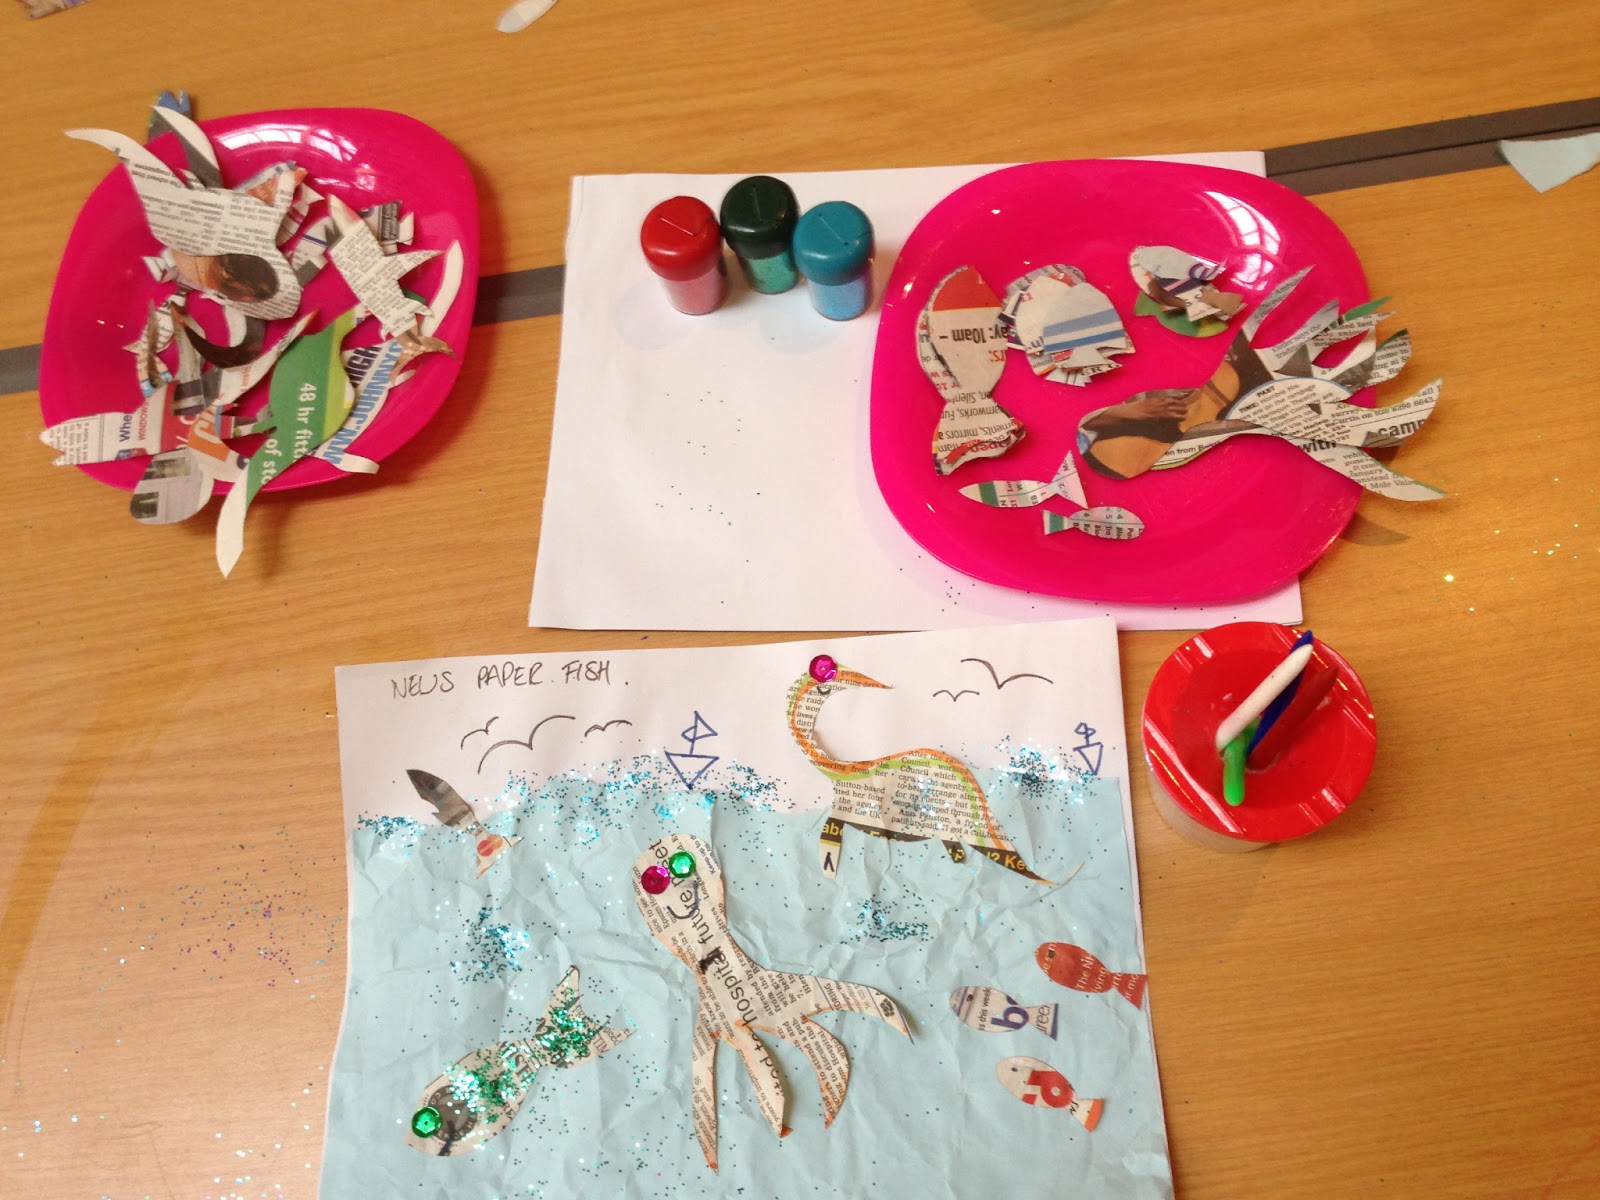 |
| News paper fish prep |
/ Draw some fish, shark, octopuses, nessy monsters on a newspaper and cut out (tip: try to cut through as many sheets as you can to save you cutting out the same shape over and over).
/ Take a piece of blue A4 paper and rip a wavy line across the long side of the paper, about 10cm from the top. Discard the smaller ripped off piece.
/ Crumple up the large piece of blue paper and then flatten out and stick on top of the white A4 using glue.
/ Now the fun begins... select your sea animals and stick on in any place or direction that you like.
/ Use a felt tip pen to draw faces, bow ties, hair, teeth, gills on to the sea animals.
/ Stick opn some sequins for eyes of the sea animals
/ Apply some glue to certain areas of the craft (e.g. the top of the sea, around the sea animals) and then use some glitter to jazz the sea scene up
/ Use a felt tip pen to draw some seaguls and boats above the ocean.
And voila! A lovely sea animals scene!!
 |
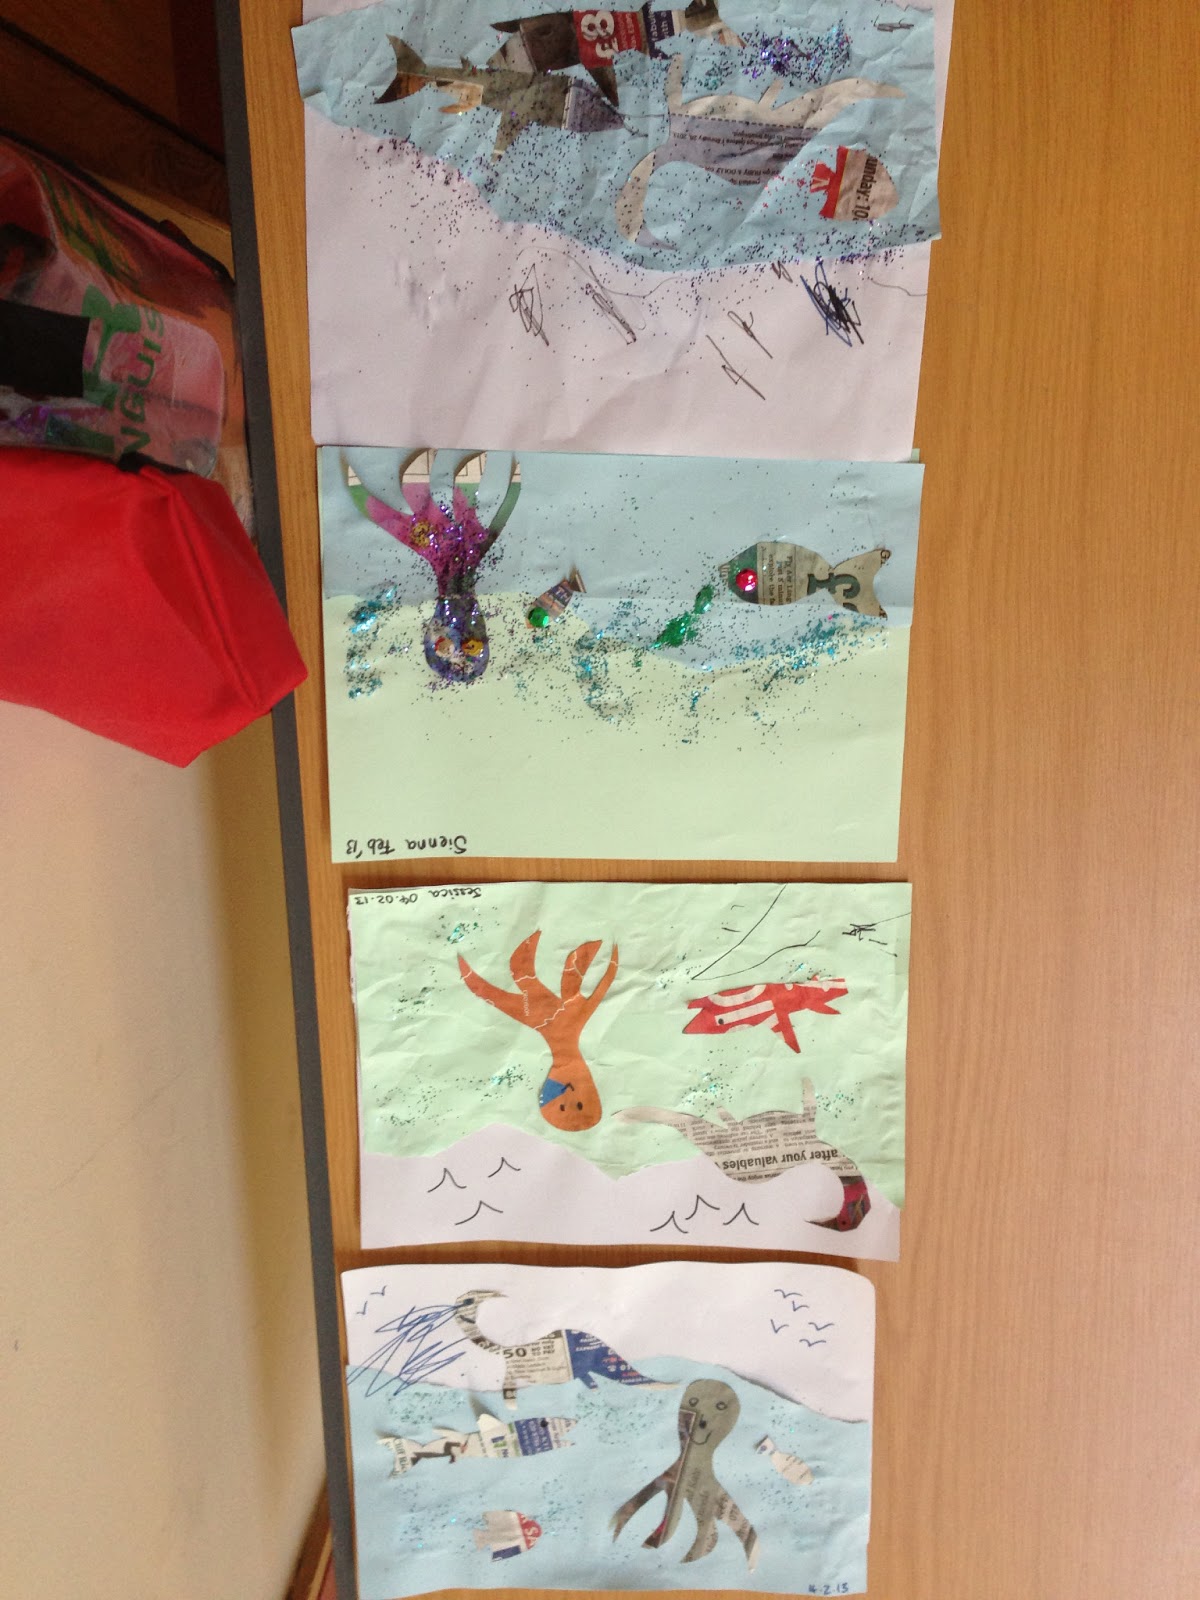
| News paper fish created by our crafty toddlers |
 | |
|
Thursday, 10 January 2013
January (week 3) - Lion heads
Create a fun and hand sized lion head for your crafty toddlers. Takes about 10 mins to create (not inc preparation time).
To make your crafty lion head you will need:
- Coffee stirrer
- Cardboard circle
- Felt tip pen
- Yellow paint
- Glitter
- Gogglie eyes
- Cello tape
- Pipe cleaner
Here are the steps to make lion heads with your crafty toddlers:
1/ draw your lion face on the advocated circle
2/ paint the lions main
3/ add glitter to lion main
4/ once dry, stick on eyes with a dab of PVA glues and stick to stirrer with cellotape
5/ wrap pipe cleaner around stirrer
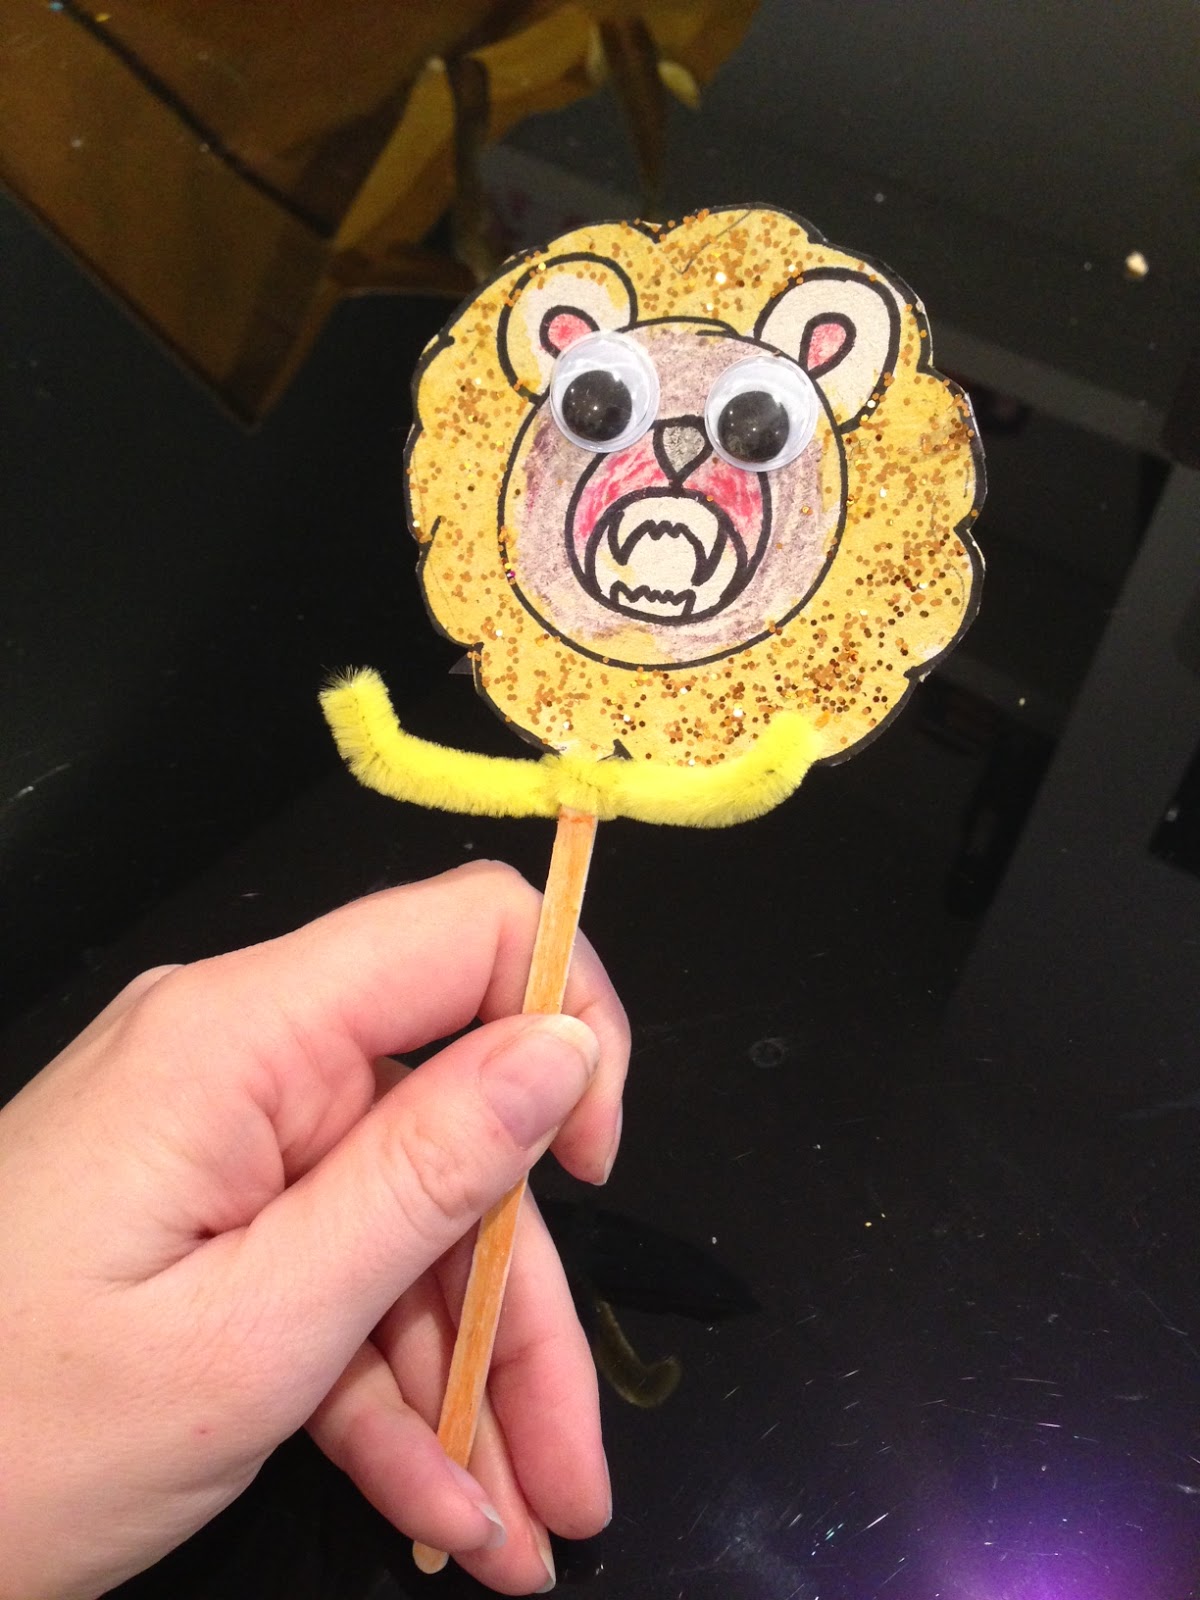 |
| The finished product - hand sized lion head |
To make your crafty lion head you will need:
- Coffee stirrer
- Cardboard circle
- Felt tip pen
- Yellow paint
- Glitter
- Gogglie eyes
- Cello tape
- Pipe cleaner
 |
| Hand sized lion head prep |
1/ draw your lion face on the advocated circle
2/ paint the lions main
3/ add glitter to lion main
4/ once dry, stick on eyes with a dab of PVA glues and stick to stirrer with cellotape
5/ wrap pipe cleaner around stirrer
 |
| Deciding on a lion face and cutting out the outline |
 |
| Hand sized lion head before decoration |
|
| Hand sized lion head after decoration |
Subscribe to:
Posts (Atom)