Showing posts with label toddler arts and crafts. Show all posts

Saturday, 1 June 2013

May - Mr Rollie Heads

This is a very fun piece of craft to do with your toddlers and creating Mr Rollie Head in all different colours and expressions went down a treat too. The prep time is minimal but does require you to have stored up some toilet roll iners.

Mr Rollie Head - Bring him to life using your fingers as arms

The things you will need to create your Mr Rollie Heads are:
Toilet roll inners
Paints
Glitter
PVA glue
Pom poms
Sheets of coloured tissue
Boggling eyes OR white circle stickers
Felt tip pen
Here are the things that you need to create your Mr Rollie Head
Follow these steps to make your Mr Rollie Head:
1/ Add some PVA glue to your paints so that the glitter will stick to the paint without needing another layer of glue
2/ Paint the toilet roll inner
3/ Add glitter and sequins then leave to dry
4/ Once dry, stick on the boggling eyes or white stickers and draw on pupils with the felt tip pen

Top tip - draw on eyelashes or eyebrows or draw different shaped pupils to create a character

5/ Stick on a pom pom for the nose
6/ Draw on a smilie mouth

Top tip - draw on teeth or a tongue to create a character

7/ Take a sheet of coloured tissue and glue in in to the top of the toilet roll to give Mr Rollie Head some hair!
Mr Rollie Head - The finished product

Our family of Mr Rollie Heads

Monday, 1 April 2013

April (week 12) - Spring animal prints

Spring animal prints are fun and easy to do, prep time is about 10 mins and you can create multiple backgrounds for different spring scenes.

Spring animal prints
Things that you will need to create your spring animal prints are:
/ Farmyard animal sponges
/ A4 paper
/ Felt tip pen
/ Paints and brushes
/ Glitter

Spring animal prints - preparation kit
To create your spring animal prints with your crafty toddlers, follow these steps:
/ Draw the background on to the paper - the spring scenes that we used were duck ponds, cow shed, rabbit hutch and fenced field.
/ Help your crafty toddler to paint the sponges then squish the sponge on the paper.

Top tip: don't be shy with the paint on the sponge as more paint makes for better prints

/ Use paint brushes to add some splashes of colour to the background scene
/ Add glitter for the finishing touch!

Top Tip: using different coloured paint on a sponge can produce some really colorful prints

Spring animal printing in progress
Spring animal print
Spring animal print
Spring animal print
Our spring animal print family


March (week 11) - Easter bonnet

A really cute Easter bonnet to make with your craft toddlers. My craft toddler made this at his nursery but I thought it was such a simple and good idea that it was worth a post.

Easter bonnet


March (week 11) - Easter Chick

Chicks are synonymous with Easter and this is a quick and easy piece of toddler art and craft to do. We bought a pack from Craft Crocodiles that had a lot of the materials already included so kind of a 'open and do' craft session with zero preparation.

Easter chick
The steps we followed to make our crafty toddler Easter chick:
/ Spread PVA glue over the entire chick.
/ Add shredded tissue for the tummy, glitter & sequins everywhere else.
/ Add boggling eye
/ Colour in beak
/ Stick on tail feathers

Monday, 11 March 2013

March (week 9) - Finger Monsters

Finger monsters are a really fun thing to make with your crafty toddler. Prep time only takes 3-5 mins and the craft fun can keep going until you have more finger monsters than you can handle!

The finished product - finger monster
Things you will need to create your crafty finger monsters are:
/ Cardboard (from breakfast cereal boxes is good for this too)
/ Scissors
/ Paints & brushes or sponges
/ PVA glue
/ Sequins
/ Glitter
/ Dark felt tip pen
/ Bogglie eyes
Finger monster prep kit
To make your crafty finger monsters follow these steps:
/ Draw the outline of your monster on the cardboard and cut out (any shape is fine, think about adding some hair or a hat or horns to the outline).
/ Mark and cut out the areas for your or your toddlers fingers.
/ Get decorating with paints, sequins, pompoms or glitter - whatever takes your fancy!
/ Leave to dry.
/ Stick on your bogglie eyes.
/ Draw on a mouth (smiles or mouths with goofy teeth work well).

Here are some of the finger monsters that our craft toddlers made!

Our finger monster family
Finger monster close up

Thursday, 7 March 2013

February (week 7) - Decorating Insects & Reptiles

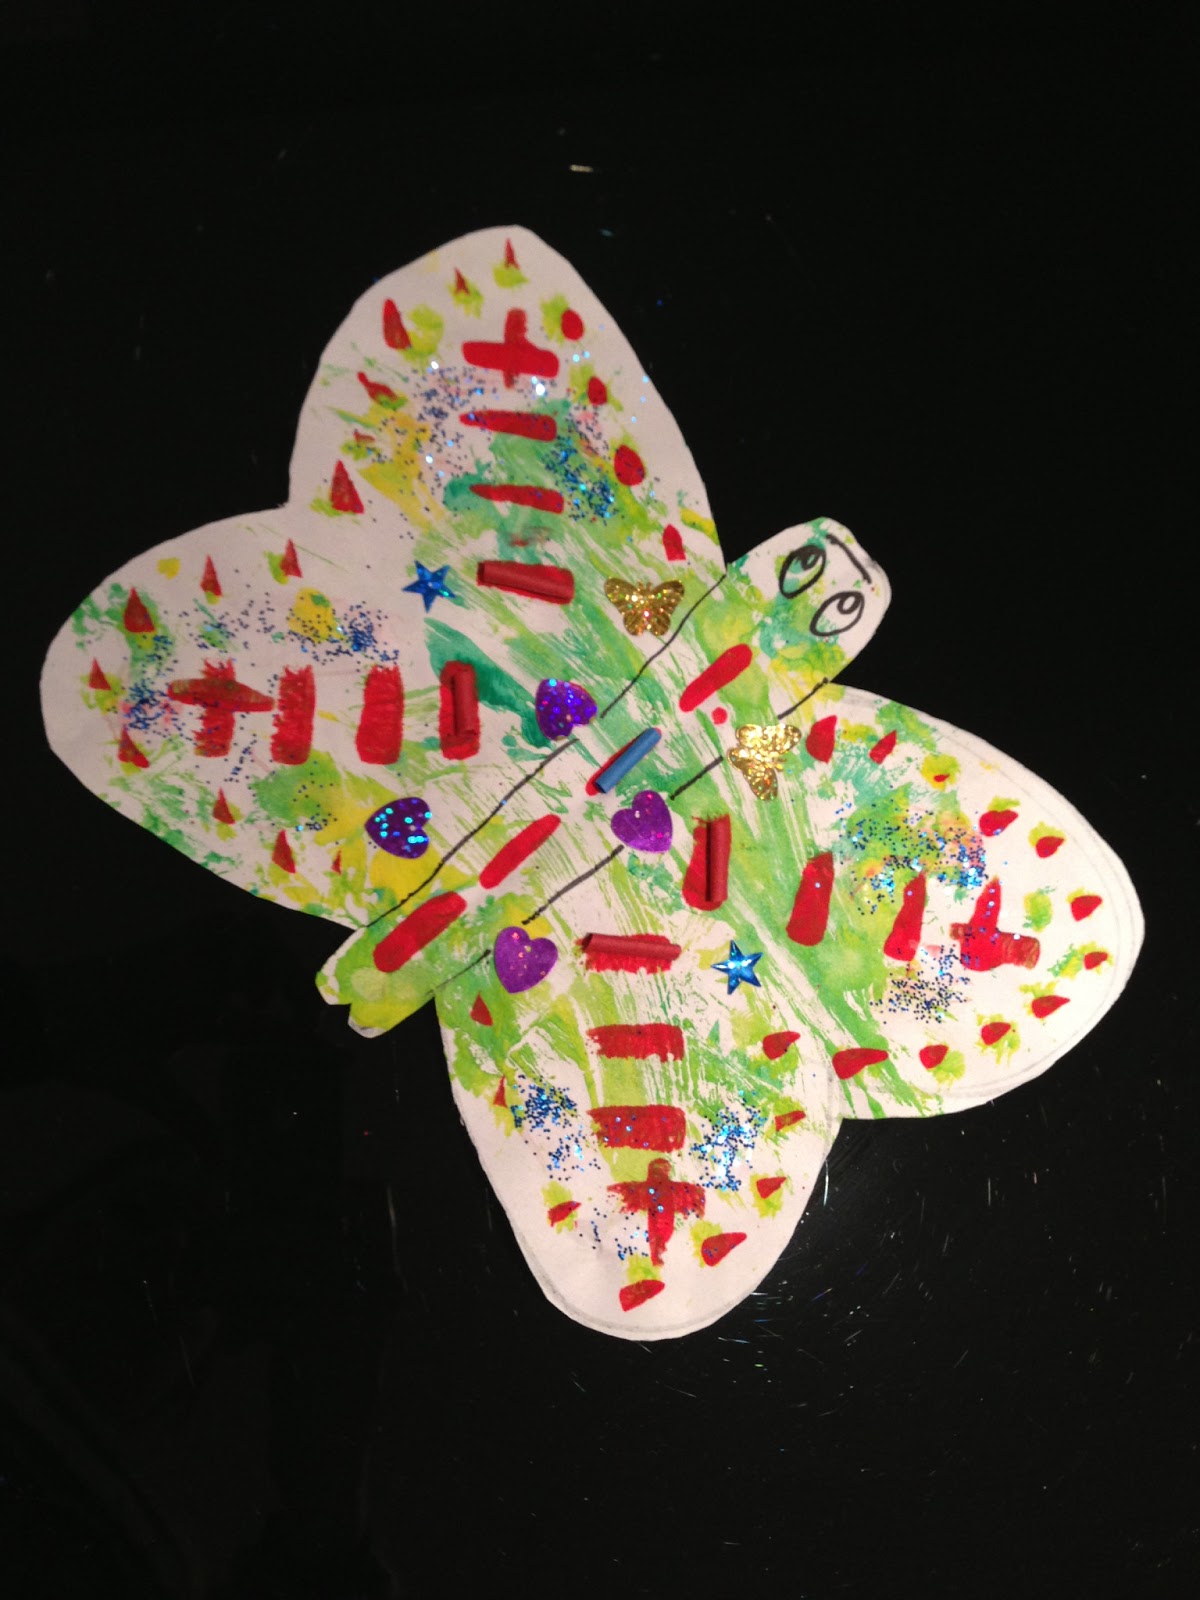
Painting and decorating inspects and reptiles is very easy and quick art and craft piece to do with toddlers. The prep time is only about 5 minutes and the fun can last as the insects and reptiles can be embellished until your toddlers are all art and crafted out!

The finished product - decorated lizard
Things you will need to create your insects and reptiles are:
/ A4 paper (any colour)
/ Paints (any colour)
/ Range of different paint brushes
/ Glitter (any colour)
/ Art straws
/ Black felt tip pen
/ PVA glue
/ Sequins
/ Wooden coffee stirrers
/ Cellotape

Decorated insects and reptile prep
Follow these steps to make your beautiful insects and reptiles:
/ First thing is to cut out the insects reptiles - this is a job for an adult obviously. To cut out multiple copies just draw the outline on one piece of paper then stack up approx 10 pieces behind the template when you cut it out.
/ For the butterfly, stack up some paper, fold in half, draw the outline then cut it out.
/ Get decorating - it's up to your crafty toddler how to decorate but you can paint first and adorn with sequins and glitter later or you can glue first and layer on the decorations painting once the glue is dry.
/ Leave to dry.
/ Draw on eyes and smiles to make your animals friendly.
/ Cellotape a coffee stirrer to the back of the animal to make it come alive!!!

Top tip: keep the animals / objects that you cut out as large as possible this makes it easier for crafty toddlers to hold and decorate at the same time.

You can put your own spin on this, cut out some different animals or objects such as fish, lions, flowers, leaves and heart.

Decorated snake
Decorated butterfly


Monday, 7 January 2013

January (week 2) - Thank you cards

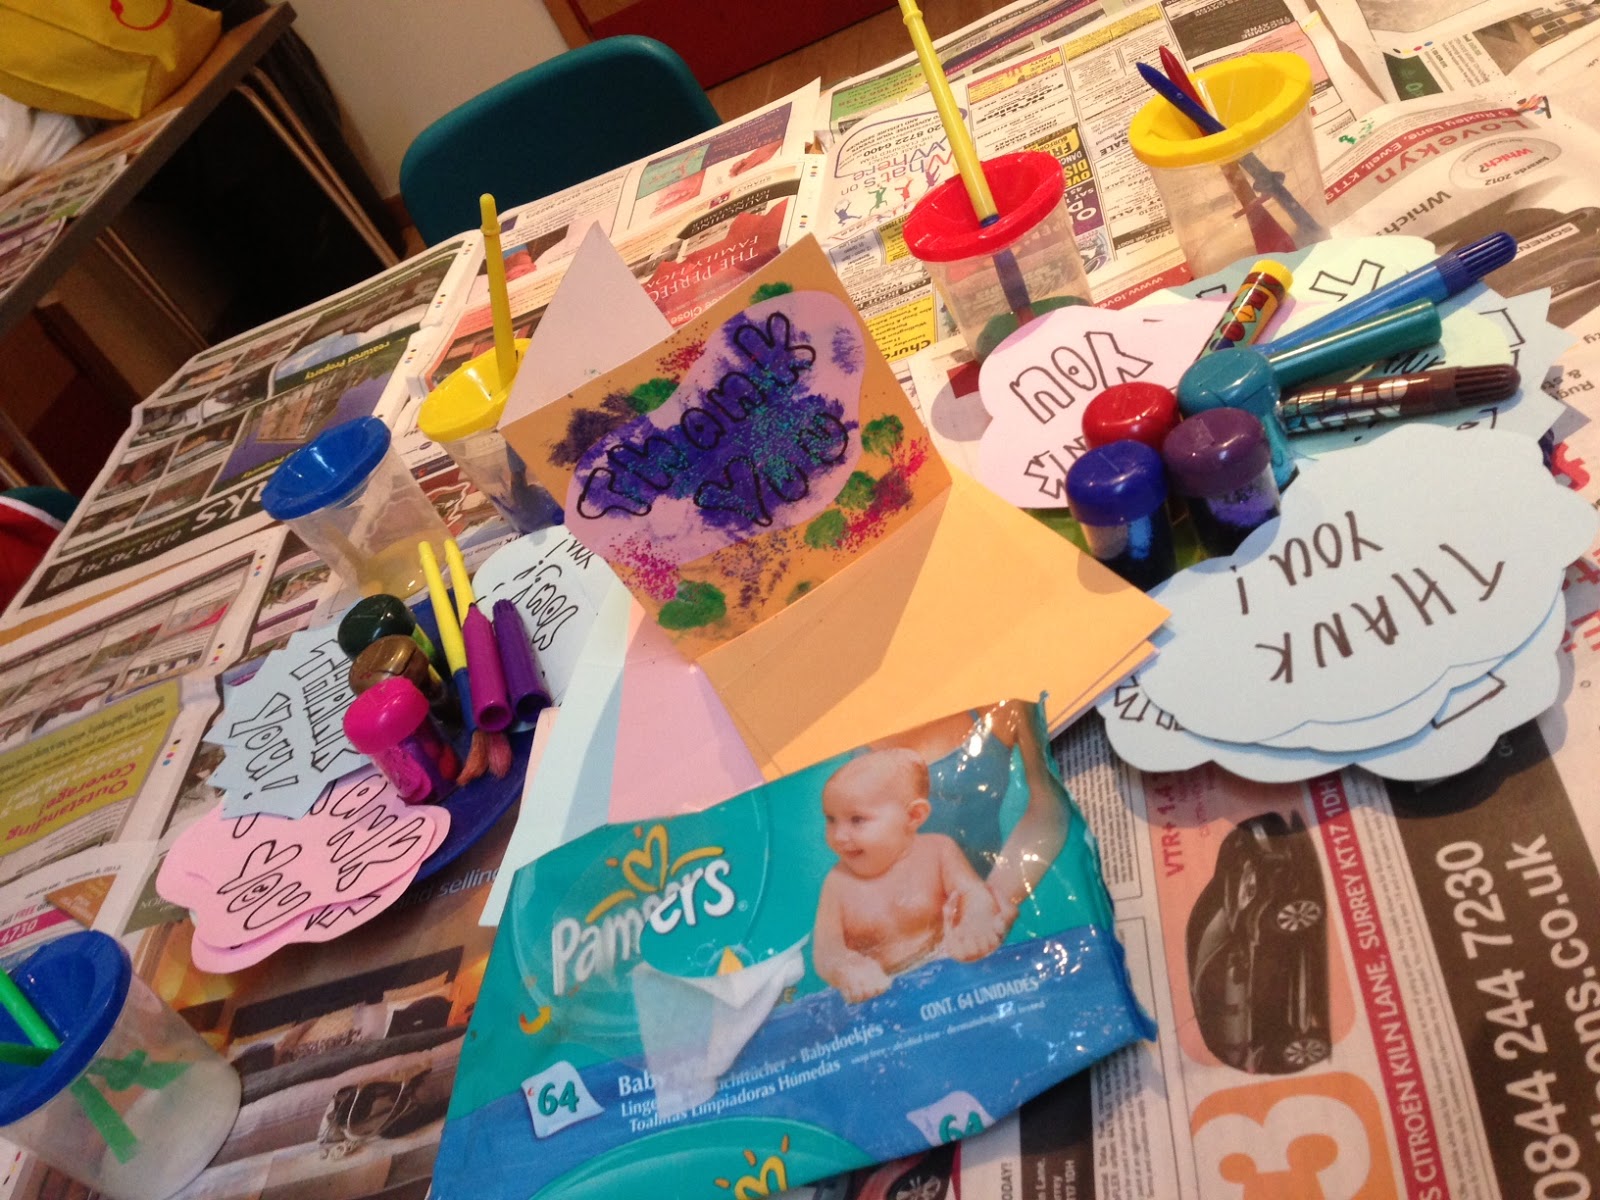
Our first art and craft session at toddler group in 2013 was to make some Thank you cards.

Finished product - Thank you card

To make these cards you will need:
 - A5 cards (can be bought or make your own by cutting A4 card in to two equal parts and then fold in half)
 - A5 envelopes (bought)
 - Glue
 - Paint
 - Glitter
 - Sharpie pen
 - Thank you message (cut out of A4 paper). Make sure this is written with perminant marker to stop any smudging / running when it is painted

Thank you card prep kit
Steps to make your Thank you card:
1/ Use Sharpie pen to write the full message on the inside of the card (inside)
2/ Use paint to do some hand or feet imprints on the card (front, back and inside)
3/ Paint or glitter the Thank you message
4/ Apply a smear of glue to different parts of the card and sprinkle glitter (front and back)
5/ Glue thank you message to front of card
6/ Leave to dry

 Here is an array of some of the other cards made at toddler group today:

Some of the Thank you cards created by our craft toddlers
A hand print to sign the Thank you card

Arts and crafts schedule (Jan - Mar)

Being organised and planning some months in advance is a good tip. I have created a 3 month schedule which means that I can plan ahead and buy in the supplies that we need with minimal stress.

Here is a draft schedule from Jan to March. Over the next weeks I will document the craft creations that our toddlers make during the art and craft sessions at our toddler group.

Toddler craft ideas for January:
7th jan - thank you cards
14th jan -  spoon heads (wooden spoons)
21st jan - bird watch (potato paining)
28th jan - news paper fish


Toddler craft ideas for February:
4th feb - Chinese new year
11th feb - Shrove Tuesday - pancake day OR valentines day cards
18th feb - painted snakes
25th feb - Purim (Jewish festival) OR Fair Trade Fortnight

Toddler craft ideas for March:
4th mar - Mothering sunday (10th March)
11th mar - comic relief (red nose day) OR St Patrick's Day (17th March)
18th mar -  Holi (27th March) Hindu celebration
25th mar - Easter Sunday (painted eggs)

other ideas:
pirate hats
door signs
potatoe painting spring scene
paper monsters
blow painted monsters

Crafty inspiration

These are the places that I have looked for inspiration for out toddler arts and crafts:

For a calendar of events through each month, check out:
http://www.kinderart.com/seasons/
http://www.educationscotland.gov.uk/resources/r/resourcecalendar/january.asp?strReferringChannel=resources&strReferringPageID=tcm:4-671956-64

Blogs:
http://www.enchantedlearning.com/crafts/

Pinterest:
http://pinterest.com/thinkliz/toddler-crafts/
http://pinterest.com/akstrauss/crafts-for-toddlers/

Getting Started

Having recently agreed to take on the role of Arts & Crafts organiser at our local toddler playgroup - I thought I might document the things we make so that anyone else in a similar position has a base that they could use if they wished.

My aim is to document the crafty activities that we do and also give some guidance to the equipment and supplies needed for each crafty creation.

Our toddler group is called 'Little Stars' and it is in Ashtead, Surrey, every Monday from 10am at St Georges Church hall (term time). It is run by mums for mums for toddlers up to 3 year.